
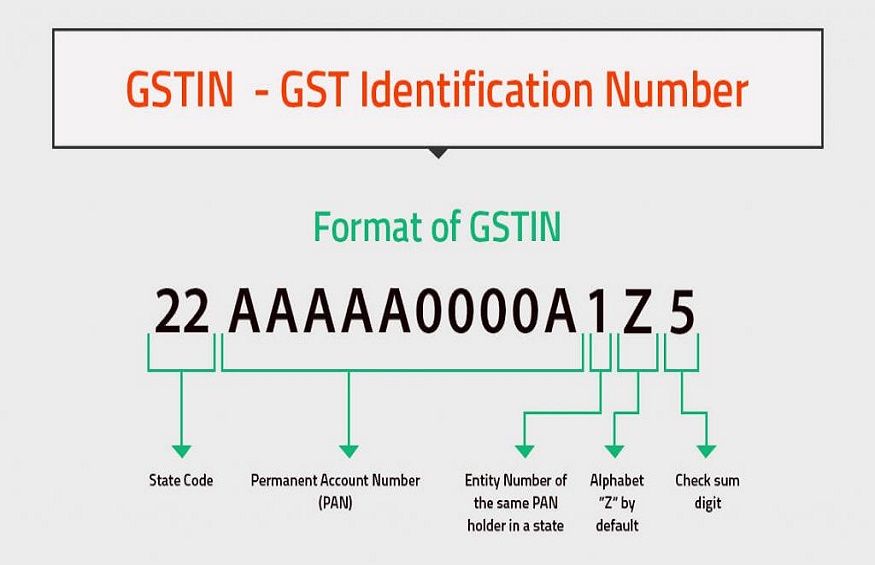
The GST Registration number is a 15 digit identification number which is based on the PAN card number and State code. It is allotted to applicant after completing the steps of the registration process.
Following are the steps to obtain the GST registration number:
- You need to login to the GST portal https://reg.gst.gov.in/registration/
- You need to fill up the Part A of GST Registration Form-1.
- The applicant receives the Application Reference Number.
- You need to enter the second part of the registration form and upload the requisite documents of the business.
- The certificate of the registration is issued by the government of India.
In order to obtain the GST registration number, one has to complete the online GST registration process .
Following is the procedure to register for GST in India:
1st Step – Go to the GST portal and select the ‘Register Now’ option under the Taxpayers (Normal)
2nd Step – Enter the requisite details in Part A of the registration form.
Select Taxpayers from the dropdown and select the State and District from the dropdown.
Fill in with the Name of the Business and PAN number of the business and enter the registered Email Address and Mobile number on which the OTPs will be sent.
Now click on ‘Proceed’.
3rd Step – The OTPs received on the E-mail Address and Mobile number has to be entered. Now click on ‘Continue’. If the OTP has not been received, click on the ‘Resend OTP’ option.
4th Step – A Temporary Reference Number (TRN) will be sent to the registered Email Address and Mobile number which has to be taken note of.
5th Step – Once the above step is completed, visit the GST portal again and click on ‘Register Now’.
6th Step – Now select the Temporary Reference Number (TRN), fill the provided TRN and Captcha code and click ‘Proceed’.
7th Step – Now the OTP will be sent to your Registered Email Address and Mobile number. You need to enter the OTP and click on ‘Proceed’.
8thStep – Now the status of the application will appear as drafts. Now click ‘Edit’.
9th Step – Part B comprise of 10 sections. You need to fill all the details and submit requisite documents which include:
(a) Constitution of the taxpayer
(b) Photographs
(c) Proof of business location
(d) Details of the bank account
(e) Authorization form
10th Step – After filling in all the required details, you need to go to the ‘Verification Page’. Check in the Declaration box and submit the application using any of the following three ways:
(a) The companies must submit the application using the Digital Signature Certificate (DSC).
(b) The application can also be submitted by using the e-Sign method. For this you need to enter the OTP which will be sent to the Phone number registered with Aadhaar.
(c) It can also be submitted by using the Electronic Verification Code (EVC) method. For this, you need to enter the OTP which will be sent to the registered mobile number.
11th Step – The screen will display a success message and the Application Reference Number (ARN) will be sent to the registered Email Address as well as the mobile number.
Read more: 3 Industries Being Disrupted By Blockchain
The Application Reference Number (ARN) status can also be checked by entering the ARN number on the GST Portal.